Tips for Digital Wedding Photography
Why are we running separate Wedding Photography Tips for people using digital cameras? There are several reasons.
First and foremost, NYI Webmaster Sharon Gumerove recently attended a big wedding, and brought her digital point-and-shoot camera with her. The tips that follow are based on her experience at what turned out to be a great wedding and a giant reception. That means separate digital tips are in order, and those of you who take a digital camera to a wedding for the first time will get better results if you follow these wedding photography tips from an experienced photographer who discovered important differences between working in digital as opposed to film.
Second, there's a social implication as well. A while back, we heard Jason Schneider, long time Editor-in-Chief of Popular Photography, address a group of photography industry executives on the provocative subject "The future of film." His overall thesis was that film use will continue to decline and eventually yield its dominance to digital capture, but he predicted it will continue as a niche product for a decade or more.
More to the point, Schneider noted what he calls the "fun factor" of digital. He told the audience that he had attended two recent weddings, and here is what he observed: Among the guests there were loads of digital cameras, but no single-use film cameras or film-based point-and-shoot models. Several guests who were clearly serious photographers were using film-based SLRs, and the professionals who had been hired to photograph the weddings used film-based medium format cameras. However, the digital users were consistently showing their results on the LCD viewing screen on the back of the cameras to other guests and the bride and groom. Guests asked for copies of photos and promises were made to e-mail photos. E-mail addresses were exchanged. Cell phones with cameras open up even more possibilities.
At the wedding, the "fun factor" of digital includes instant results and the opportunity to share moments from an event while the event is still ongoing. So, without further ado, here are our Tips for Great Digital Wedding Photos.
Just like we mentioned in our companion piece, Seven Tips for Great Wedding Pictures, this wedding photography article is designed to help you, the wedding guest, capture great photos with your digital point-and-shoot camera. Our goal is not to turn you into a professional wedding photographer using traditional or digital camera equipment. Rather, we'll help you understand the issues you'll face when you try to take digital photos at any of the affairs you're likely to attend as a guest this wedding season.
Tip 1: Take lots of extra camera batteries and memory cards.
This may seem like an obvious tip to many photographers, but it is even more important if you are using a digital camera rather than a traditional film-based model. The reasons for this are two-fold. Digital cameras, as anyone who uses them knows, require great amounts of power, particularly if you use the built-in LCD screens. So, taking an adequate number of batteries with you is common sense. However, because of issues with recycling time and shutter lag that are inherent in digital cameras, you're likely to be taking many more photos at the reception than you may think, since many of them may not come out. Consequently, you'll be draining your camera's batteries by not only taking the photos, but by reviewing them during the reception.
Which brings us to the second part of this tip: bringing as much memory with you as possible. The more memory cards you have with you, the less likely you'll be to miss the party as you sit in your chair trying to find space on your card for one more picture. You know... that all important one of your best friend getting hit in the head with the bridal bouquet. The one picture you can't possibly miss! So, plan ahead and bring more than you think you'll need in both memory cards and batteries.
Tip 2: Take advantage of your camera's ability to change ISO.
Many point-and-shoot cameras are set automatically so that they expose much like a traditional camera loaded with 100 ISO film. This is great for outdoor photos, but may be woefully inadequate inside a reception hall or church even with the flash turned on. However, unlike traditional film-based point-and-shoots, many digital cameras are more sophisticated and allow the photographer to set higher ISO ratings. If you find that the backgrounds of your photos are coming out dark, even with the flash on, try boosting the ISO setting on your digital camera to 200 or 400. While you may pay for this increase in gain with some graininess, color shifts, and artifacts, you'll find that the backgrounds will be much lighter and the on-camera flash will appear to work much better.
Tip 3: Don't expect too much from your flash.
This is true with any point-and-shoot camera. The on-camera flash tends to be woefully inadequate, but it's still better than nothing. Just remember that the flash is not likely to cover a lot of distance, leaving much of the background in your photos dark. To compensate, try adjusting the camera's ISO setting, and remember to place your subjects up close to fill as much of the frame as possible. Don't expect to get great group shots of people dancing, particularly in dimly lit reception halls. Also, remember that flash units take time to recharge, so you are not going to be able to snap one picture after another without waiting until the camera and flash are ready. Think ahead and plan which images are important to you so that you don't miss the action while waiting for the flash to recharge. Finally, don't expect red-eye reduction to work over long distances. It's great when you're taking static portraits (just remember to warn your subjects so that they don't move after the first flash) but it won't help if you're zooming in on your subjects from half way across the room.
Tip 4: Shutter lag.
It takes time for a digital camera to capture the image and then record that image on the camera's memory card. This is very different than traditional film cameras where there is little or no delay from the time you press the shutter until the image is recorded on film. While digital cameras are getting better and better, odds are you'll find this delay noticeable and annoying when taking pictures at a reception. If you are trying to take action photos, for instance, of people dancing, you may find that many of your pictures have people walking into the frame, or you'll have captured images of the backs of the dancers rather than their faces. For action shots, the only solution is to try to anticipate the action by pointing the camera where you think the action will be and pressing the shutter before your subjects actually move into the space. Even with static subjects, such as guests posing with the bride and groom, shutter lag can result in photos where your subjects' eyes are closed or they have weird expressions on their faces. You, and your subjects, will need to have patience while you take enough pictures to insure that you have captured some good ones. Trial and error, (as well as lots of memory cards and batteries), will result in your getting some good shots. And, with all that practice, you'll eventually develop a feel for how long your camera's time lag is, which should improve your digital wedding photography enormously.
Tip 5: Digital images are not the same as film images.
Digital photos are not necessarily better or worse than film images. They're simply different. Just like different film choices lead to different results in color balance, choosing to use a digital camera will give your photos a different look and feel from that of using a film camera. For instance, your digital camera will likely react to light differently than standard 35mm film. You may find your photos will have more contrast than normal. Underexposed images may show more color shifts and artifacts, while overexposed images may have completely blown out highlights. That can be a big problem if the bride is wearing a white gown, so you'll want to pay attention to your exposure and compensate if necessary.
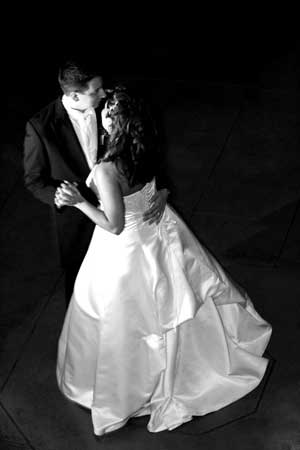
One of the biggest differences between digital and film cameras has to do with depth-of-field. Depth-of-field is the photographic term for explaining how much of a photograph will be in focus. Photographers know that if they choose a high f-stop, such as ƒ/16 or ƒ/22, they can expect great depth-of-field with much of the foreground and background in focus. Choosing a low f-stop, ƒ/2.8 or ƒ/4 will throw backgrounds out of focus, drawing attention to the subject. This is true for traditional film-based cameras. In theory, it should be true for digital cameras as well. Many digital point-and-shoot cameras do give the photographers the controls they need to adjust f-stop and shutter speed. However, digital cameras use shorter focal length lenses and therefore attain much higher depth-of-field even at low f-stops. If you are taking digital photos at a wedding reception, expect that more of your background will be in focus. Notice, in this photo (below left) the wedding guests watching the bride and groom dance. The wedding guests are quite a distance from the couple, yet are in focus. This higher depth-of-field can also create some interesting effects, such as in this picture (below right) where the rice in the foreground of the picture is in focus.
Tip 6: Take advantage of the fact that your images are digital.
Since your images are already in digital form, you can take advantage of this in two ways. First, you can use digital imaging programs to enhance or correct your photos. For instance, you can crop your photos to remove distracting elements or correct red-eye. Want to save an under-exposed image? Here's a trick you might try. If the image is too dark and you have artifacts or color shifts in it, consider converting it to a grayscale black-and-white image. It's an easy fix that will remove the unwanted color from the photo. Then, you can adjust the levels of the image, fixing the exposure. It may not work in every case, but you'll likely resurrect a few photos you thought were unusable.
The second thing you can do with your digital wedding photography is share them. Upload your photos to one of the online sharing sites, such as Shutterfly, Ritzpix, Fotki, or Kodak, and let the other wedding guests or the bride and groom look at your photos. They'll even be able to order prints without you having to get involved. Since digital cameras produce images of varying sizes, you'll want to resize and crop them first before uploading, making them fit standard print sizes of 4x6 or 8x10. Remember to change the resolution so that your images are 300 pixels per inch to insure good prints. It's also a good idea to make TIFF copies of all your photos before you start working with them since JPEGs degrade each time you save them.
Taking a digital camera to a wedding when you're a guest can be fun! You don't have the pressure that the professional wedding photographer has to get every photograph. By using a digital camera, you can see the pictures immediately, take more photos as needed and fix the ones that you have to. Even better, surprising the bride and groom with additional photos of their special day makes a great and thoughtful gift.
Source : www.nyip.com


Digital Wedding Photography

No comments:
Post a Comment
Hi, please feel free to share your comment here.
For example: Which pictures is the best?
Thanks,
Admin